KB No. 11: Creating an mst transformation file with Advanced Installer
In this article, you will find detailed instructions on how to create an MSI transformation file so that you can add properties when installing the MSI via GPO.
Background
When deploying the Olfeo SaaS mail agent via GPO, you will need to configure certain properties (in this case, the configuration URL) that the installer will require. Using a transformation file is a good approach for doing this.
Prerequisites
- You must have the Advanced Installer software installed.
- Please note that we recommend using Advanced Installer, but you are free to use the software of your choice by adjusting the following procedure to your software.
- You must also have the Olfeo SaaS Mail Agent installer, which can be downloaded from the Olfeo SaaS configuration interface in Configuration > Directories, as well as the configuration URL that you will be using.
Note: The procedure below only applies to workstations running Windows 10 or higher.
Procedure
Note: The screenshots below were taken using Advanced Installer v22.3. There may be differences (particularly in the interface) depending on the version you are using. However, the principle remains broadly the same.
- Open Advanced Installer and then go to the menus. New → Transformers → Response Transform then click Create New Project:
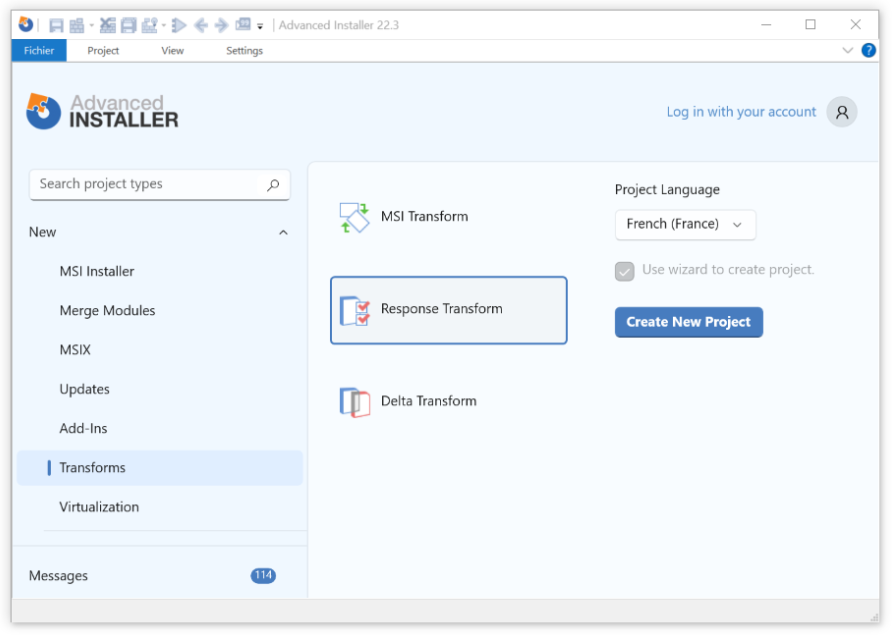
- In the window that just opened, select the previously downloaded Post Agent installer file (.msi), then specify a path to save the mst file:

- Click Next until the Mail Agent installation wizard opens.
- Follow the wizard and enter the URL for the Mail Agent configuration.

- You now have an mst file that you can use to deploy the Workstation Agent via GPO across your fleet.